| |
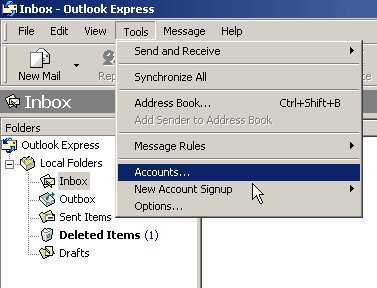
These instructions will walk you through
how to setup your Outlook Express 6 mail program. If a setup wizard
loads cancel the wizard and follow the instructions here. After the wizard is gone, choose "Accounts" from the "Tools" menu at the top
of the window.
|
|
|
|
|
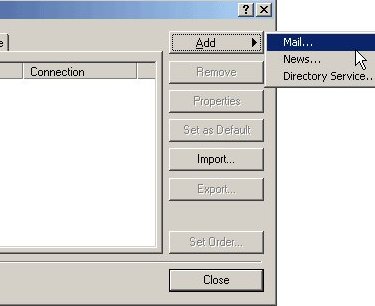
The next window that pops up will be "Internet
Accounts". Click the "Add" button to the right and choose "Mail..."
from the popup menu.
|
|
|
|
|
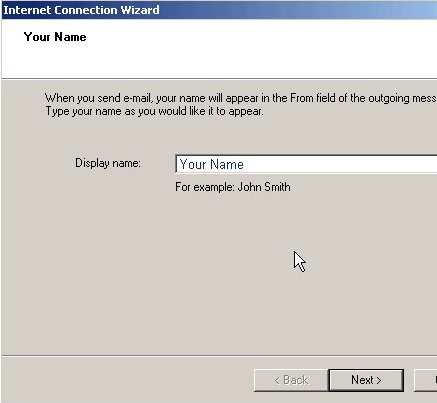
A window will load called "Internet Connection Wizard".
Simply enter your name in the "Display Name" box. This is the name
people will see when they receive an email from you. You can use your
own name, a favorite nickname or even a department or company name. After entering the name,
click the "Next" button.
|
|
|
|
|
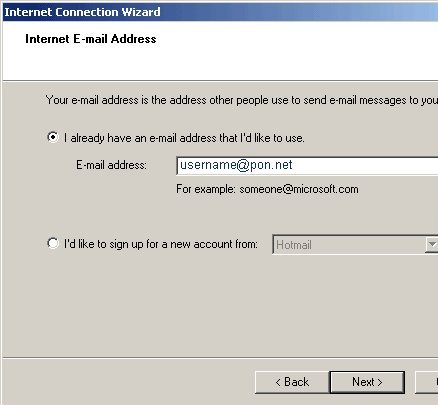
Now select "I already have an e-mail address..."
& type in your Pacific Online email address. Now press the "Next" button.
|
|
|
|
|
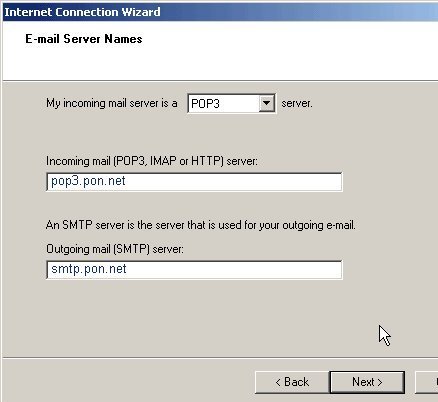
In the next window be sure the "My
incoming mail server is a" "POP3". The second box, "Incoming Mail",
needs to read: pop3.pon.net The "Outgoing Mail" box setting needs to
read: smtp.pon.net. After entering the mail server names, click the "Next" button.
|
|
|
|
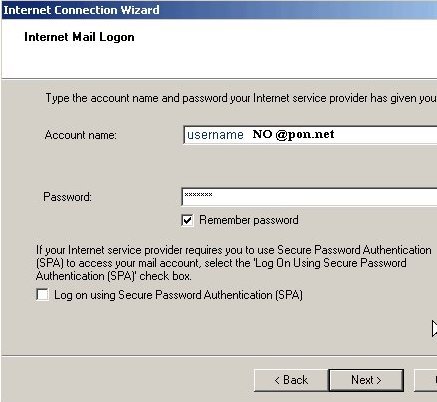
In the "Account Name" box enter
the first part of your Pacific Online email address, without
the @pon.net. Enter the password that you chose for
your email account. Next, place a check mark in the "Remember password" box.
NOTE:
Business Emails Only: (i.e. .com, .org, .net, .biz -
other) --> Your account name MUST be your full email
address. |
Do not check the "Log on using Secure Password
Authentication" box. Lastly, click the "Next" button.
|
|
|
|
|
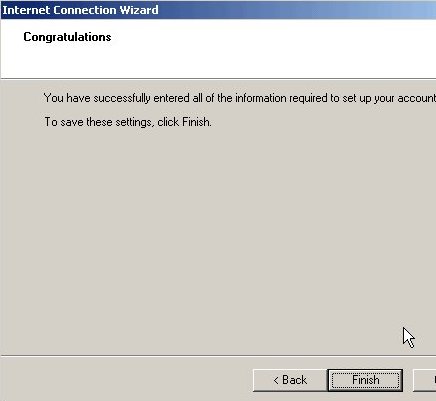
Click on "Finish" on this
screen.
|
|
|
|
|
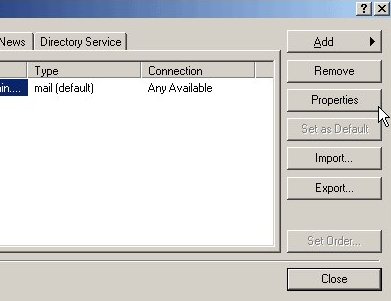
You will now be back at the "Internet
Accounts" window. You will now need to click on your
"account" to highlight it blue. This will be the line of
text in the white box. Once you have highlighted this blue, click the
"Properties" button on the right side of the window.
|
|
|
|
|
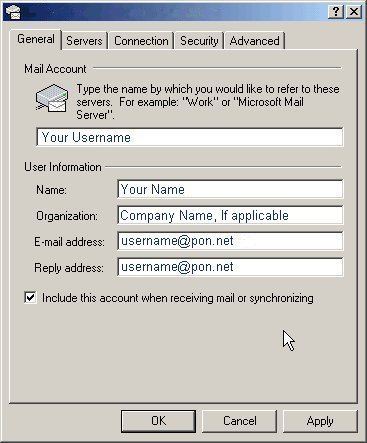
Under the "General" tab in this
screen update the Name, Organization, Email Address and Reply Address.
Be sure to check the box for "Include this account when receiving mail".
Once this information has been entered click on the
"Servers" tab.
|
|
|
|
|
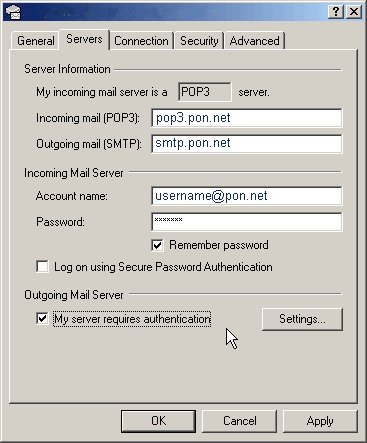
Near the bottom of the "Servers"
box, check the box that says "My server requires authentication". This
is an important setting because it prevents unauthorized users from sending email out using your
email account. If you forget to check this box, you will be able to receive email, but not send email.
Once you have checked this box, click on the "Settings" button in the
bottom right hand corner.
|
|
|
|
|
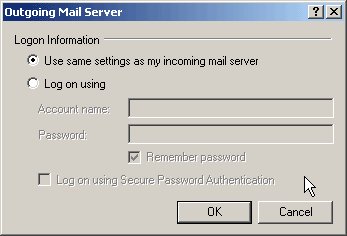
In the "Outgoing Mail Server" window that pops up, be sure that the "Use same settings as my incoming
mail server" is checked. Finally click "OK" which will close this window.
|
|
|
|
|
You are finished with setting up your
email account in its entirety. Lastly close any windows that are open
- but leave Outlook Express open. Click on the Create Mail tab and try
sending an email.
|